Introduction
The Topology explorer provides a topological view of your resources and helps you to troubleshoot the networking issues.
Prerequisites
Before accessing topology map, make sure to check the following:
- Device Manage and Device View permissions enabled for the user.
- CDP and LLDP enabled on the network resources.
Refer to the respective vendor documentation to enable CDP or LLDP on the respective network resources. - Desired gateway protocol selected while configuring discovery prodile.
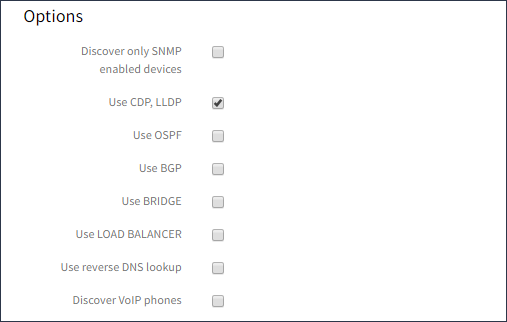
Network discovery protocols
- Application Discovery & Dependency Mapping enabled while creating a client. Application topology appears only if this option is enabled.

Enabling application discovery and dependency mapping
Viewing topology explorer of different resources
To view topology explorer of different reources:
- Click All Clients, select a client.
- Go to Infrastructure > Topology.
- From the filter drop-down list, select the desired entity. For example, to view topology explorer of an AWS resource, select AWS from the drop-down list and provide the details.
Topology explorer of the selected entity appears.
Refer to the following sections for detailed information on viewing topology explorer for each entity.
Search for resource topology using HostName/IP Address
View the topology of a specific resource by providing the hostname or IP address. To view the topology:
- From filters, select HostName/IP Address if not appearing by default.
- Select the desired resource, Depth level, and the topology layout.
The topology explorer appears with the base resource you selected and its neighbors along with the connections.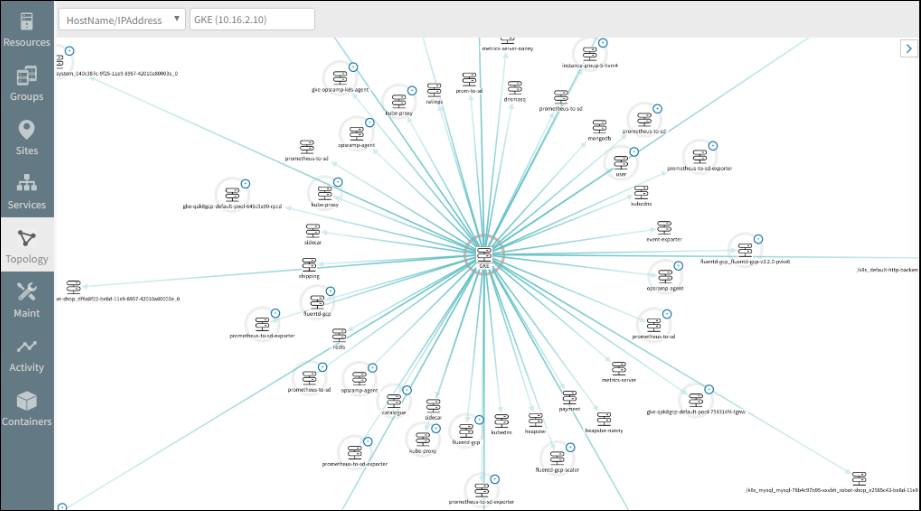
Searching for a topology using Host Name or IP Address
View application topology
View the topology for applications running in your environment. For example, you can visualize the context of an A10 Load Balancer application running in your environment.
Important
To view Application topology, the installation of Agent on the application running resources is mandatory.Prerequisite
Before accessing application topology, be sure Application Discovery & Dependency Mapping is enabled while creating a client.
To view application topology:
- From the HostName/IP Address drop-down list, click Applications.
- From Select Application drop-down list, select the desired application.
- Select the desired Depth* and topology layout.
Application topology appears along with inbound, outbound connections, number of alerts, incidents, and patches missing on an application.
View AWS topology
After integrating AWS cloud services with OpsRamp, you can view the resource dependency for different services using Topology explorer. For example, DevOps and site reliability engineering (SRE) teams can visualize the topology context for AWS resources like EC2, VPC, RDS, or ELB and troubleshoot issues by analyzing the context.
To view AWS topology:
- From the HostName/IP Address drop-down list, click AWS.
- From Select Account and Select Location drop-down lists, select the desired AWS account and location.
- From services drop-down list, select the desired service.
AWS topology map of the selected account appears. If you want to view topology of a particular AWS instance, select the instance from the Resource drop-down menu. The topology map of the selected resource appears. - Click a resource to view resource details, resource availability status, the number of alerts triggered on the resource.
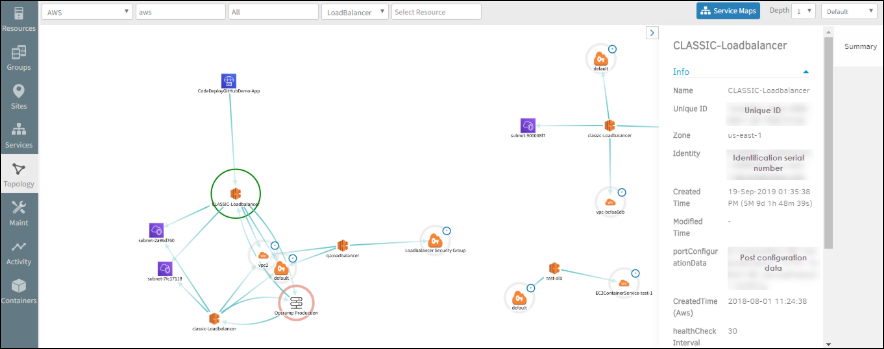
AWS instance topology
View Azure topology
After integrating Azure cloud services with OpsRamp, you can view the resource dependency for different services using the Topology map. For example, DevOps and site reliability engineering (SRE) teams can visualize the topology context for Azure resources like Load Balancer, Application Gateway, or Virtual machine and troubleshoot issues by analyzing the context.
To view Azure topology:
- From the HostName/IP Address drop-down list, click Azure.
- From Select Account and Select Location drop-down lists, select the desired Azure account and location.
- From services drop-down list, select the desired service.
Azure topology map of the selected account appears. If you want to view topology of a particular Azure instance, select the instance from the Resource drop-down menu. The topology map of the selected resource appears.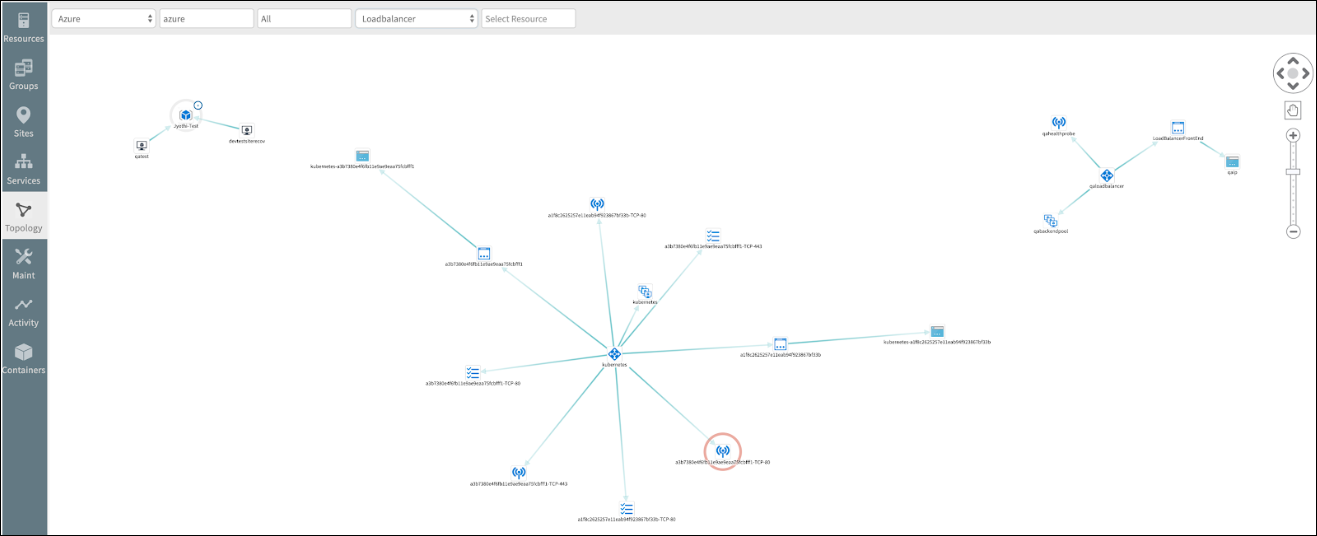
Azure instance topology
View Google topology
After integrating Google cloud service with OpsRamp, you can view the resource dependency for different services using the Topology map. For example, DevOps and site reliability engineering (SRE) teams can visualize the topology context for Google resources like App Engine, Load Balancer, or VM instances and troubleshoot issues by analyzing the context
To view Google topology:
- From the HostName/IP Address drop-down list, click Google.
- From Select Account and Select Location drop-down lists, select the desired Google account and location.
- From services drop-down list, select the desired service.
Google topology map of the selected account appears. If you want to view topology of a particular Google instance, select the instance from the Resource drop-down menu. The topology map of the selected resource appears.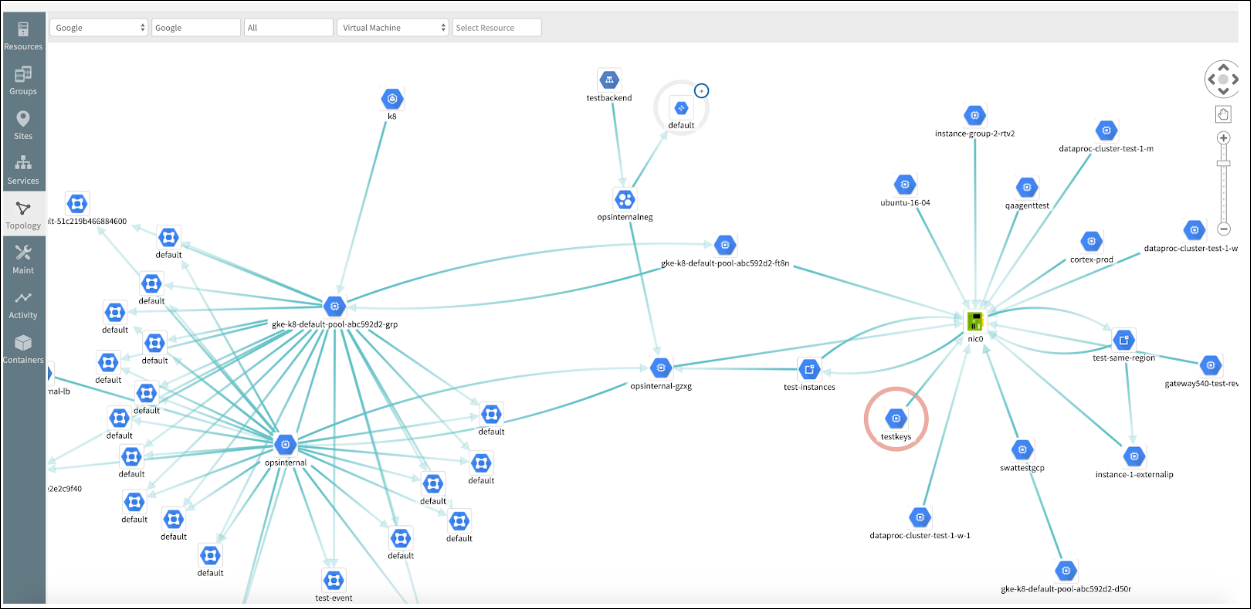
Google instance topology
View hypervisor environment topology
The hypervisor environment consists of KVMs, vCenter, and ESXi hosts. After onboarding these resources, you can view the topology map that contains the resources along with their dependent hosts.
To view hypervisor environment topology:
- From the HostName/IP Address drop-down list, click the entities KVM or vCenter or ESXi Host.
- From Select Resource drop-down menu, select the desired resource.
Topology of the selected resource appears.
View Kubernetes topology
After onboarding Kubernetes, you can view the topology of your Kubernetes infrastructure (Nodes and Containers) operating in your environment through the topology map.
Important
To view the topology of Kubernetes resource, you need to install Agent on the Kubernetes resource.To view Kubernetes topology:
- From the HostName/IP Address drop-down list, click Kubernetes.
- From the Select Resource drop-down menu, select the required resource.
- Select either Nodes or Containers from the drop-down menu.
- Select the desired Depth and topology layout.
Kubernetes topology appears. - Click the resource to view the details.
Summary pane appears showing the inbound, outbound connections, and applications running on the resource.
Integrating topology explorer with service map
Creating a service map requires accurate knowledge of application dependency structures. You may often rely on tribal knowledge of application topology to create service maps when most of the dependency structures are captured by topology itself. To eliminate this problem, OpsRamp provides a solution wherein you can create Service Maps directly from Topology explorer page.
Key highlights
- Earlier, you could only view the information about a resource in Topology. Now, you have the ability to create Service Maps directly from the Topology explorer page.
- Creating Service Maps directly from the Topology explorer page reduces the time in configuring multiple filters to create a Service Map and also enables better alert correlation, more logical resource grouping and assignment of maintenance mode.
Note
You can create Service Maps for entities like HostName/IP Address, AWS, Azure, Google, Hypervisor environment and Kubernetes directly from the respective Topology explorer page. However, you cannot create a Service Map from Application topology.To integrate topology with service map:
- Select HostName/IP Address from the filter drop-down list if not selected by default.
- From Select Resource drop-down list, select desired resource.
- Click Service Maps.
All functionalities stop and Create (Mapping) button appears on top. - Select the checkbox Select All to add all the resources to a Service Map.
The resource that is not highlighted is the non-monitored resource.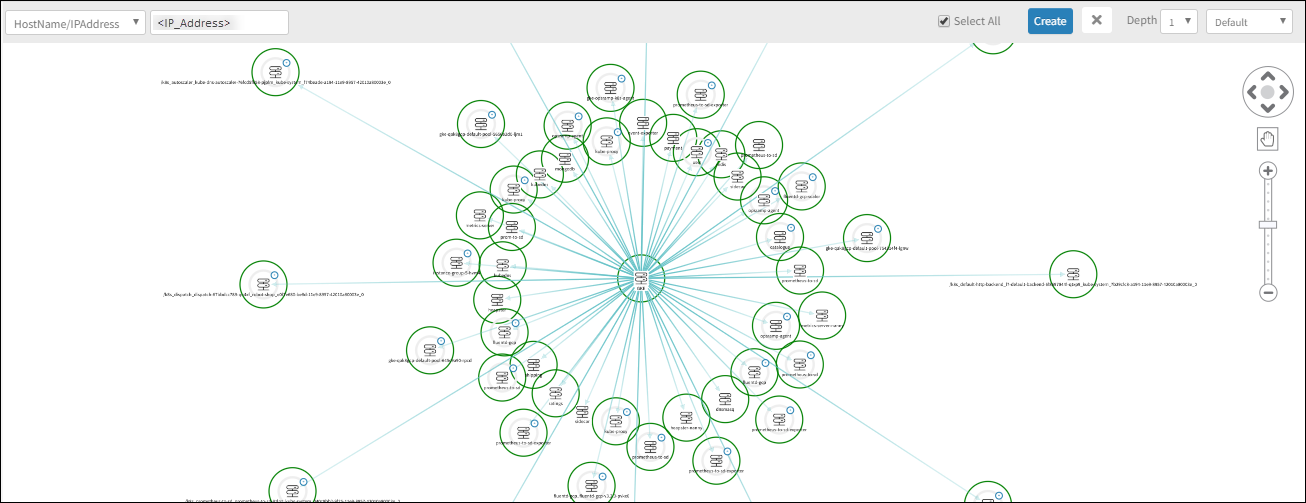
Select resources to include in service maps
- Click Create to add a mapping.
Create Mapping is displayed.
You can view the list of Selected Resources.
Note: Deselect any of the resources if required. The deselected resources are removed from the Service Map. - Provide Node Name and Service Map Name.
- From Select Type, select either of the two options New Service Map or New Node on Existing Service Map.
- Click Create.
If you have selected New Service Map in the previous step, the confirmation pop-up informs about the successful creation of Service Map.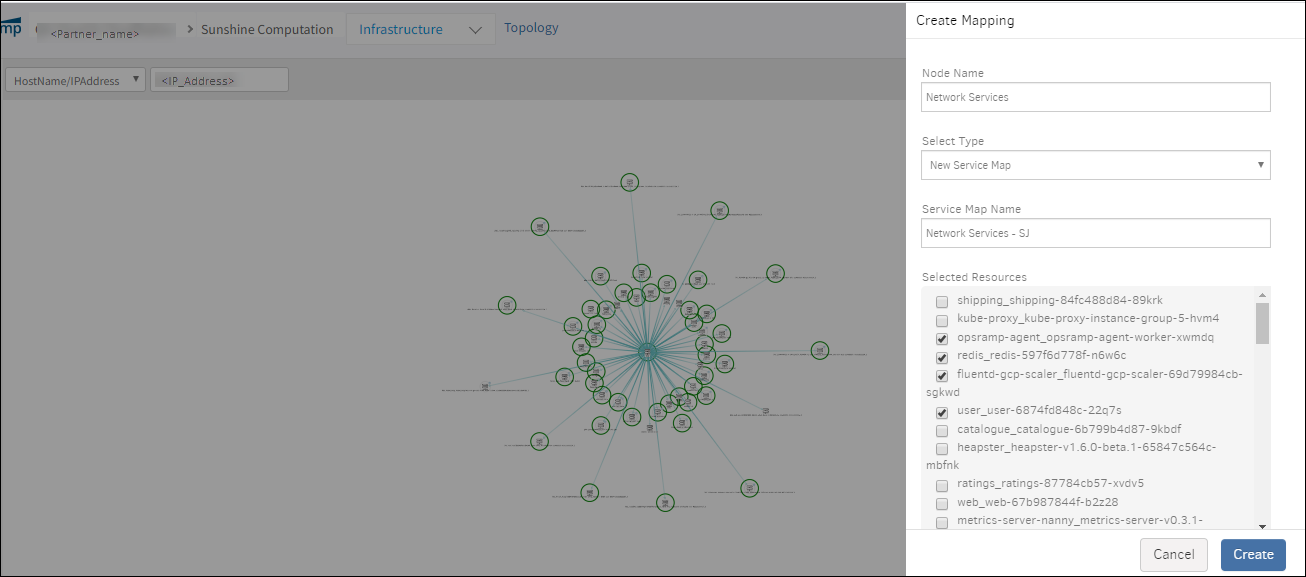
Create mapping
- Click Go to Service Map.
The created service map is displayed with details.
Service map created from topology